Adobe framemaker
Frequently asked questions
adobe framemaker
Expert Adobe FrameMaker services for technical documentation. Multilingual DTP, structured authoring, and long-document publishing solutions.
What is FrameMaker?
XML smart, enterprise ready! Adobe FrameMaker is a desktop publishing and Help authoring application published by Adobe Systems. It is especially suited for creating long technical documents.
Read moreWhat is FrameMaker?
XML smart, enterprise ready! Adobe FrameMaker is a desktop publishing and Help authoring application published by Adobe Systems. It is especially suited for creating long technical documents.
Read moreWhat is FrameMaker?
XML smart, enterprise ready! Adobe FrameMaker is a desktop publishing and Help authoring application published by Adobe Systems. It is especially suited for creating long technical documents.
Read moreAutomatically Saving to MIF?
It is not unusual to have “mixed” FrameMaker workflows where members of a team are using different versions of FrameMaker. Documents saved in a lower version can be opened with higher versions, but you can’t open documents saved with a higher version with a lower version of FrameMaker. There are two solutions: First, you can use the higher version to “save down” to the lower version. However, you can only save down to the next lowest version, for example, from FrameMaker 12 to FrameMaker 11. Second, you can save the document to MIF (Maker Interchange Format) in which case you can open it with any lower version of FrameMaker.
The main sticking point with saving to MIF is that you have to remember to do it. But with ExtendScript, you can automate this. You can create a script that will automatically save the document to MIF whenever you choose File > Save or press Control+S. When you are ready to pass the MIF file onto another team member that may be using a lower FrameMaker version, you know that it will always reflect the latest saved changes.
Here is how to set up the script below:
- Copy the code below and paste it into an empty text file.
- Save the text file to a convenient location with the name “SaveAsMif_Event.jsx”.
- Quit FrameMaker if it is running.
- Copy the file to C:\Users\
\AppData\Roaming\Adobe\FrameMaker\ \startup, where is your Windows login name and is the FrameMaker version that you are using. If the startup folder does not exist, create it. - Start FrameMaker and test the script. Open a document, make some changes to it, and save it. You should see a corresponding MIF file in the same folder as the document.
Notification (Constants.FA_Note_PostSaveDoc, true);


function Notify (note, object, sparam, iparam) {


    switch (note) {

        case Constants.FA_Note_PostSaveDoc :

        saveAsMif (object);

        break;

    }

}


function saveAsMif (doc) {


	// Get required parameters for the save function.

    var params = GetSaveDefaultParams();

    var returnParamsp = new PropVals();


    // Replace the .fm extension with .mif.

    var saveName = doc.Name.replace (/\.[^\.\\]+$/,".mif");


    // Get the FileType save parameter and set it to MIF.

    var i = GetPropIndex(params, Constants.FS_FileType);

    params[i].propVal.ival = Constants.FV_SaveFmtInterchange;


    // Save the document as MIF.

    doc.Save(saveName, params, returnParamsp);

}
Reference:
https://frameautomation.com/automatically-saving-to-mif/ Read more
MASTER PAGES versus BODY PAGES?
Changes to the structure of your document should be made on the Master pages. By default, a single sided document will only have a master page title "Right". A double-sided document would then have a "Right" and a "Left" master page. You can add as many master pages as you need for a document, however when you are writing text and come to the end of a page, by default Frame will create a new page using the format from the left or right master page.
You should think of the master page as including any information that you need for any and all pages of a single format. This would include headers/footers and the layout of the text on a page (for instance, the margins, or number of columns on a page).
Once the changes to a master page are made, they may need to be applied to the appropriate body pages in your document. You should only explicitly change a body page if you know that the change is only for that page, and that any changes to the document are not going to require those changes be undone.
In the body pages you should only include the body of the document, such as any text, figures, tables, etc. that you may need to include. Since these are generally not duplicated, there is no need to place the information on a master page.
What if I want to save time by Cutting and Pasting my FrameMaker?
Sometimes it is helpful to Copy or Cut a Variable to the clipboard for Pasting. Pasting may be done as you type for easy Variable insertion. Pasting may also be done through the Find/Change window. An example of when you might use the Find/Change would be if you decided to replace a frequently-occurring phrase in a document with a Variable and wanted to quickly change all occurrences.
To place FrameMaker Variables on the clipboard (so they may then be Pasted), you must first select the Variable. To do this, click once so that the Variable highlights but the Variable dialog box does not open. Either Cut (CTR-V) or Copy (CTRL-C) and the Variable will be on the clipboard, ready to Paste.
When you Paste, the Variable should drop into your document at your insertion point. If you are Pasting into paragraphs that use the same default font as the paragraph you Copied from, you will have no problems.
If, however, you Paste a Variable into paragraphs with different text sizes or fonts, your Variable will not always match the text around it. The fix for this is to redefine your Variable so that it will automatically match text it is Pasted into. (This will be much easier than reformatting by hand!) Redefine your Variable so that its definition begins with the building block:
Even if you are using a Character Tag in your definition, this will work. Just make sure your other tag appears after the building block above.
Note: If you are about to design a template, it is a good practice to define all the Variables to start with
How to change line SPACING?
Frame does not allow you to simply set a document's line spacing to be single or double-spaced. Instead, you can effectively set the line spacing for a paragraph tag or type (e.g. Body) in one of two ways.
One way to set the line spacing is to move the text cursor into a paragraph and select the Format -> Paragraph -> Designer menu option.
In the Line Spacing field, select the point value which corresponds to single, 1.5, or double line spacing. Then, to set the spacing value for this paragraph only, click on the Apply button. To set the spacing for all paragraphs tagged with the same name, click on the Update All button.
The other way to change the line spacing for an individual paragraph is to move the cursor to that paragraph, click on the button with horizontal lines on it, located under the Format and View menus, and choose the line spacing you desire.
How to change the MARGINS for a document?
There are a number of different methods for changing the margins in FrameMaker. Here are two:
1) Go to the Format menu and choose "Page Layout->Column Layout".
This will bring up a popup window. In the window, move to the "Column Margins" section, and set the Top, Bottom, Left or Right margins to your preferred size. Then click on "Update Entire Flow" to make your changes take effect for all your pages.
2) Select the text column for which you wish to change the margin (Ctrl-click). You will notice that the select box has small black squares all around it. To move the edge of the column move the mouse over one of these black boxes. The mouse pointer will change to an arrow pointing in the direction of the edge. Click the left button and slide the edge until you have it at the desired side. For accuracy there is a reference line that moves along the top of the ruler.
If you do this to a single body page, it will change the margins on that body page. If you do this to a master page, it will change the margins on all the pages associated with that master page.
Changing PAGINATION (and what it is)?
Changing the pagination settings for a paragraph allows you to specify things like "A chapter heading must always start a new page" or "A figure paragraph should span both columns of a two-column document". The options you can select here are:
Start: This allows you to specify specific staring places for a paragraph. For example, if you wanted to have all new chapters start at the beginning of a new page, you would select Top of Page. Other options include: Top of Column, Top of Left Page, Top of Right Page, Anywhere, & As is.
Keep With: This allows you to specify that a paragraph remains connected to the paragraph before or after it.
Widow/Orphan Lines: This number indicates the number of lines of a paragraph that have to remain together alone at the end of a page (orphan) or the beginning or the next page (widow).
In Column: This places the paragraph in a text column (standard).
Run-In-Head: This creates a run-in heading (not on
a separate line from the following text). You can specify punctuation which always follows the heading (like a period or a colon), which will be added unless the header text has its own punctuation.
Side Head - Alignment: This creates a side heading, typically placed to the left of the body text. The alignment specifies how the header will be placed with respect to the body; "top edge" will align the top edges of heading and body, "last baseline" will align the bottom of the heading with the top of the body, and "first baseline" will align the
bottom of the first line of the heading with the top line of the body.
NOTE: if you want to use Side Heads, make sure to turn on "Room for Side Heads" in the under Format -> Page Layout -> Column Layout
Across All Columns: This places the paragraph across all columns of the document (though not across the space allotted for Side Heads)
Across All Columns And Side Heads: This places the paragraph across all columns of the document, as well as across the space reserved for Side Heads.
As Is: You would use this option when you have selected paragraphs with different pagination properties, and you want them to keep the properties that they currently have.
How to UNLOCK a file?
If you accidentally, or perhaps on purpose, locked a Frame document when you saved it, to unlock it you will need to open the document and, with the mouse in the document window, type the following in order to unlock it:
Ctrl-r F l k
Note that the F is capital, and the r, l, and k are not. This key binding is actually a toggle, so you can lock the file again by repeating it.
How to make a BIBLIOGRAPHY?
There is no way in frame to generate an automatic bibliography for your document. The bibliography can be done by hand, in which case you will have to add the citations yourself, or with the help of a BibFrame. BibFrame will try to generate bibliographies for you, but it does not work perfectly. Once you are finished, you will want to edit the bibliography to find any mistakes that BibFrame made.
To use BibFrame, you will first need to create a .bib file with entries in it for all of the sources you would like to cite. For information on how to create this file, consult the stock answer entitled "How to make BIBLIOGRAPHIES in Latex" under the Latex topic.
Once you have a .bib file, you can create the citations by typing the "key" for the bibliography entry where you would like it to be cited. Then, highlight the key and hit C-r b m. This will run a macro which will zip through a bunch of menus and beep. Repeat this process for all your citations in all your files.
Next, you need to generate the bibliography. First set the environment variable BIBFRAMEREF to the comma separated list of file names without the .bib extension. For example, if my .bib file is
/mit/dot/thesis/thesisbib.bib, I would type
athena% setenv BIBFRAMEREF "/mit/dot/thesis/thesisbib"
Secondly, choose the style of citations you wish to use and set the variable BIBFRAMEBST accordingly:
athena% setenv BIBFRAMEBST "mmlunsrt"
Note that possible citation styles are:
mmlabbrv mmlalpha mmldraft
mmllongkey mmlmapalike mmlplain
mmlquoteabbrv mmlquotelongkey mmlquoteplain
mmlquoteunsrt mmlunsrt
Next, open the file that you want to contain your bibliography. If you are generating a bibliography for a book, this should be a separate FrameMaker document. In this case, you should copy a template bibliography file from the templates locker:
athena% attach templates
athena% cd directory-with-your-frame-files
athena% cp /mit/templates/frame5/Bibframe/biblio.doc.
For a single document file, go to the place you want to insert your bibliography. Create a new paragraph tag (Format -> Paragraphs -> Designer) called "Reference" (it doesn't matter what the settings are) and apply it to this empty paragraph. Finally, in the same xterm that you typed the setenv commands, run the bibframe command:
athena% add frame
athena% bibframe < list of files >
e.g.
athena% bibframe biblio.doc chap1.doc chap2.doc ... chapn.doc
How is FrameMaker positioned in relation to PageMaker and InDesign software?
FrameMaker, PageMaker and InDesign are targeted for unique and different publishing audiences. Each product is optimized to support its intended users. FrameMaker 7.0 software is optimized to support a template-driven workflow, where pages are formatted and laid out automatically through the use of a template; PageMaker and InDesign software are optimized to support a design-driven workflow, which relies on the skill and judgment of the user to place and format assets on a page. Another difference is that FrameMaker software includes a complete authoring environment in which users can develop their content; with PageMaker and InDesign software, text authoring is more commonly performed independently of the layout process using a different tool, such as a word processor. The typical users of each application have significantly different profiles, and the types of publications created are also quite unique to each tool.
Read moreHow is FrameMaker positioned in relation to PageMaker and InDesign software?
FrameMaker, PageMaker and InDesign are targeted for unique and different publishing audiences. Each product is optimized to support its intended users. FrameMaker 7.0 software is optimized to support a template-driven workflow, where pages are formatted and laid out automatically through the use of a template; PageMaker and InDesign software are optimized to support a design-driven workflow, which relies on the skill and judgment of the user to place and format assets on a page. Another difference is that FrameMaker software includes a complete authoring environment in which users can develop their content; with PageMaker and InDesign software, text authoring is more commonly performed independently of the layout process using a different tool, such as a word processor. The typical users of each application have significantly different profiles, and the types of publications created are also quite unique to each tool.
Read moreCan I move a book from PageMaker or QuarkXPress into FrameMaker 7.0?
Filters that facilitate the direct import of PageMaker or QuarkXPress files into FrameMaker are not provided in FrameMaker 7.0. However there are a variety of methods to move the contents of a book from PageMaker or QuarkXPress into FrameMaker. These include:
- Copying/pasting content from PageMaker or QuarkXPress into FrameMaker.
- Determining which text and graphics files are imported into the PageMaker or QuarkXPress publication, and importing them into FrameMaker.
- Using third-party filters.
- Saving a publication as a PDF file, and copying/pasting from Acrobat into FrameMaker.
- Saving a publication as a PDF file, and using Acrobat software's Save as RTF, Save as Text or Save as XML features to create files that you can import into FrameMaker.
- Saving a PageMaker or QuarkXPress page as a PDF and placing it into FrameMaker as a graphic to exactly duplicate all or part of its layout.
Can I move a book from PageMaker or QuarkXPress into FrameMaker 7.0?
Filters that facilitate the direct import of PageMaker or QuarkXPress files into FrameMaker are not provided in FrameMaker 7.0. However there are a variety of methods to move the contents of a book from PageMaker or QuarkXPress into FrameMaker. These include:
- Copying/pasting content from PageMaker or QuarkXPress into FrameMaker.
- Determining which text and graphics files are imported into the PageMaker or QuarkXPress publication, and importing them into FrameMaker.
- Using third-party filters.
- Saving a publication as a PDF file, and copying/pasting from Acrobat into FrameMaker.
- Saving a publication as a PDF file, and using Acrobat software's Save as RTF, Save as Text or Save as XML features to create files that you can import into FrameMaker.
- Saving a PageMaker or QuarkXPress page as a PDF and placing it into FrameMaker as a graphic to exactly duplicate all or part of its layout.
What is the FrameMaker Server product?
FrameMaker Server 7.0 is a print and PDF publishing engine that runs in a server-based or automated environment. FrameMaker Server software is designed for integration with a variety of data sources, including databases, application servers and web services. A rich array of import options that includes XML and Maker Interchange Format (MIF) is complemented by a powerful, comprehensive and well-document Application Programming Interface (API) known as the Frame® Development Kit (FDK). The FDK is downloadable from www.adobe.com.
Applications for FrameMaker Server include catalog publishing, database publishing, and the production of personalized documents and custom eBooks. For more information, see the FrameMaker Server Web pages.
What is the difference between FrameMaker 7.0 and FrameMaker Server 7.0?
Although both FrameMaker 7.0 and FrameMaker Server 7.0 software share the same technology and even the same installation CD, the primary difference between the two products is the permitted use for which they are licensed.
Both FrameMaker 7.0 and FrameMaker Server 7.0 software include a set of powerful, high-quality features for producing print and PDF output. FrameMaker 7.0 software, however, is designed to be used interactively by users on their desktops. It includes a fully interactive, WYSIWYG authoring environment, along with a range of tools for publishing to multiple media-particularly WebWorks Publisher Standard Edition 7.0 software from Quadralay, which enables users to publish to HTML, Palm Reader and Microsoft Reader formats. FrameMaker Server 7.0 software, on the other hand, is designed to be used programatically in a server-based or automated environment. The Frame Development Kit (FDK) is the primary means for driving the application. FrameMaker Server software is specifically designed to provide server-based features for print and PDF output.
How do I create accessible documents (PDF and HTML) from FrameMaker 7.0?
To create accessible PDF documents, you can author your content in FrameMaker 7.0 and then generate a Tagged PDF file, which can be displayed on a broad range of accessible viewing devices. To create accessible HTML documents, you can place all of the graphics in your FrameMaker publication in anchored frames and use alternate text tags to add verbal descriptions. Then, you can use Adobe GoLive to create a custom template for WebWorks Publisher Standard Edition that contains large font sizes and high-contrast graphics, and use that template to generate your HTML files.
Read moreHow do I create accessible documents (PDF and HTML) from FrameMaker 7.0?
To create accessible PDF documents, you can author your content in FrameMaker 7.0 and then generate a Tagged PDF file, which can be displayed on a broad range of accessible viewing devices. To create accessible HTML documents, you can place all of the graphics in your FrameMaker publication in anchored frames and use alternate text tags to add verbal descriptions. Then, you can use Adobe GoLive to create a custom template for WebWorks Publisher Standard Edition that contains large font sizes and high-contrast graphics, and use that template to generate your HTML files.
Read moreInDesign 2.0 does XML. Is that the same thing as XML in FrameMaker 7.0?
The XML standard defines a method of describing structured content using an ASCII text-based syntax of element tags, attributes and character encodings. Both InDesign 2.0 software and FrameMaker 7.0 software can read and write document content in XML. However, the two applications vary considerably in their features that support the processing of XML document content. InDesign software is primarily intended for graphics professionals who need to import and export XML content and to map that content to their page designs. InDesign 2.0 software supports well-formed XML, whose "free flow" approach is suitable for the graphic arts community.
FrameMaker 7.0 software offers a different level of support for XML that reflects the needs of its target users for valid XML. XML is valid if it conforms to the set of rules laid out for the type of document being processed that is typically defined in a Document Type Definition (DTD). FrameMaker software can automatically determine the DTD that is applicable to a specific XML document and validate the content for conformance to the DTD when it reads and writes XML. FrameMaker software also provides a styling language that is described in an Element Definition Document (EDD), and a method for mapping XML elements to FrameMaker document elements, such as markers, cross-references, tables and graphics that is defined in a set of Read/Write Rules. For content creation, FrameMaker software provides a structured authoring environment that tightly integrates the WYSIWYG editing mode with the Structure View window, which provides a visual display that supports the creation of valid content by providing continuous validation and guided editing. FrameMaker 7.0 software also includes tools for structuring legacy unstructured content that has previously been tagged with formatting styles. It is also possible to read and write well-formed XML while working in the Unstructured authoring mode.
InDesign 2.0 does XML. Is that the same thing as XML in FrameMaker 7.0?
The XML standard defines a method of describing structured content using an ASCII text-based syntax of element tags, attributes and character encodings. Both InDesign 2.0 software and FrameMaker 7.0 software can read and write document content in XML. However, the two applications vary considerably in their features that support the processing of XML document content. InDesign software is primarily intended for graphics professionals who need to import and export XML content and to map that content to their page designs. InDesign 2.0 software supports well-formed XML, whose "free flow" approach is suitable for the graphic arts community.
FrameMaker 7.0 software offers a different level of support for XML that reflects the needs of its target users for valid XML. XML is valid if it conforms to the set of rules laid out for the type of document being processed that is typically defined in a Document Type Definition (DTD). FrameMaker software can automatically determine the DTD that is applicable to a specific XML document and validate the content for conformance to the DTD when it reads and writes XML. FrameMaker software also provides a styling language that is described in an Element Definition Document (EDD), and a method for mapping XML elements to FrameMaker document elements, such as markers, cross-references, tables and graphics that is defined in a set of Read/Write Rules. For content creation, FrameMaker software provides a structured authoring environment that tightly integrates the WYSIWYG editing mode with the Structure View window, which provides a visual display that supports the creation of valid content by providing continuous validation and guided editing. FrameMaker 7.0 software also includes tools for structuring legacy unstructured content that has previously been tagged with formatting styles. It is also possible to read and write well-formed XML while working in the Unstructured authoring mode.
What is XMP and how is it supported in FrameMaker?
Building on the PDF metadata scheme supported by previous versions of FrameMaker, version 7.0 now supports the XMP (eXtensible Metadata Platform) standard for describing asset properties to increase their usability in a collaborative production workflow. This enables you to work more effectively with content management systems and to enable the customization and dynamic assembly of content to end users. You can add XMP metadata to the files you create with FrameMaker 7.0 by using the File Info dialog box.
Read moreWhat is Tagged PDF?
Tagged PDF files incorporate information introduced in the new PDF 1.4 specification that identifies a publication's layout elements and contents and the visual relationships between them. This allows logical reflow of tagged PDF files during viewing on a broad range of devices with widely varying screen sizes. Tagged PDF files can be read on popular handheld computers and ultra-compact laptops as well as on many types of accessible viewing devices.
Read moreWhat is XMP and how is it supported in FrameMaker?
Building on the PDF metadata scheme supported by previous versions of FrameMaker, version 7.0 now supports the XMP (eXtensible Metadata Platform) standard for describing asset properties to increase their usability in a collaborative production workflow. This enables you to work more effectively with content management systems and to enable the customization and dynamic assembly of content to end users. You can add XMP metadata to the files you create with FrameMaker 7.0 by using the File Info dialog box.
Read moreWill FrameMaker 7.0 files still print on my PostScript Level 1 printer?
Adobe is unable to certify FrameMaker 7.0 software for use on PostScript Level 1 printers. These older printers are increasingly difficult to find and maintain, and do not support modern network protocols. FrameMaker 7.0 software has been tested so infrequently on PostScript Level 1 printers that these output devices are no longer supported for use with FrameMaker.
On the Macintosh and Windows platforms, you may be able to print FrameMaker 7.0 files to a PostScript Level 1 printer without any significant problems if you have the appropriate printer driver installed on your system. On the UNIX platform, there are no known issues when FrameMaker 7.0 software directly generates PostScript Level 1. If you use any Placed PDF files that contain color or transparency information that cannot be correctly rendered for PostScript Level 1, these images may not appear as expected.
Will FrameMaker 7.0 files still print on my PostScript Level 1 printer?
Adobe is unable to certify FrameMaker 7.0 software for use on PostScript Level 1 printers. These older printers are increasingly difficult to find and maintain, and do not support modern network protocols. FrameMaker 7.0 software has been tested so infrequently on PostScript Level 1 printers that these output devices are no longer supported for use with FrameMaker.
On the Macintosh and Windows platforms, you may be able to print FrameMaker 7.0 files to a PostScript Level 1 printer without any significant problems if you have the appropriate printer driver installed on your system. On the UNIX platform, there are no known issues when FrameMaker 7.0 software directly generates PostScript Level 1. If you use any Placed PDF files that contain color or transparency information that cannot be correctly rendered for PostScript Level 1, these images may not appear as expected.
FrameMaker SGML?
SGML (Standard Generalized Markup Language) is a system for organizing documents by specifying rules for tagging content elements, for example, body text, heads, and footnotes. HTML (HyperText Markup Language) and XML (eXtensible Markup Language), both languages used for creating Web pages, are subsets of SGML.
A tag is nothing more than a command placed inside a text document that specifies how an element should be formatted. The tags contain no formatting information -- the user is free to create any format definition for any tag. When such a text file is read, or interpreted by software such as a Web browser, the material is presented according to the formats defined within the file. For example, when the browser sees an H1 tag, it looks up the formatting specifications for H1 (let's say 20-point Arial) and then displays the element accordingly.
SGML also lets you specify rules, for example, that an H1 tag is always followed by body text or a List tag cannot contain an H1 tag. These rules are contained in file called a DTD (Document Type Definition) and assure that the final document will be uniform, regardless of who is editing or authoring the content. SGML is used to organize, or structure long documents whose sections may be written by different authors, are frequently revised, and are output in assorted formats (print and Web, for example). The advantage of an SGML structured document is that the structure and format specifications are built-in, so no matter how many people work on the project, the organization of material and appearance remain consistent. Needless to say, SGML is popular with companies that build complex machines that need extensive documentation written by hordes of engineers. As a result it operates on Unix as well as Windows and Mac operating systems.
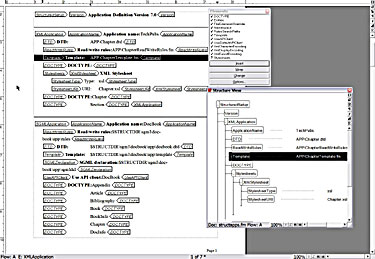
FrameMaker imports and exports both SGML or XML structured documents and includes a standard set of structured templates for common publishing tasks. These templates include the element definitions required to produce consistent structured documents (see Figure 1).
FrameMaker SGML?
SGML (Standard Generalized Markup Language) is a system for organizing documents by specifying rules for tagging content elements, for example, body text, heads, and footnotes. HTML (HyperText Markup Language) and XML (eXtensible Markup Language), both languages used for creating Web pages, are subsets of SGML.
A tag is nothing more than a command placed inside a text document that specifies how an element should be formatted. The tags contain no formatting information -- the user is free to create any format definition for any tag. When such a text file is read, or interpreted by software such as a Web browser, the material is presented according to the formats defined within the file. For example, when the browser sees an H1 tag, it looks up the formatting specifications for H1 (let's say 20-point Arial) and then displays the element accordingly.
SGML also lets you specify rules, for example, that an H1 tag is always followed by body text or a List tag cannot contain an H1 tag. These rules are contained in file called a DTD (Document Type Definition) and assure that the final document will be uniform, regardless of who is editing or authoring the content. SGML is used to organize, or structure long documents whose sections may be written by different authors, are frequently revised, and are output in assorted formats (print and Web, for example). The advantage of an SGML structured document is that the structure and format specifications are built-in, so no matter how many people work on the project, the organization of material and appearance remain consistent. Needless to say, SGML is popular with companies that build complex machines that need extensive documentation written by hordes of engineers. As a result it operates on Unix as well as Windows and Mac operating systems.
FrameMaker imports and exports both SGML or XML structured documents and includes a standard set of structured templates for common publishing tasks. These templates include the element definitions required to produce consistent structured documents (see Figure 1).
From Interleaf Quicksilver to Adobe FrameMaker?
FrameMaker includes filters for importing and exporting Microsoft Word and Interleaf/Quicksilver ASCII files. The strategy involves two major steps: prep the file within Interleaf/Quicksilver, and then finish the conversion within FrameMaker.
Converters should run tests, and develop a worksheet that answers common problems before rolling out conversion tasks across a group.
The basic Interleaf/Quicksilver package includes an export filter for Interleaf ASCII Format, or IAF. FrameMaker cannot import Interleaf/Quicksilver documents directly, but can import IAF files. This format will bring across text and tables, but can be problematic with graphics. An optional Interleaf/Quicksilver filter pack exports files to Maker Interchange Format (MIF), which is FrameMaker software's equivalent of IAF. This format can produce quite good conversion results.
Interleaf/Quicksilver preparation. LISP is the Interleaf/Quicksilver programming language, and LISP scripts can be used to automate data extraction. Areas where scripting may be useful:
- Renaming Interleaf/Quicksilver components to FrameMaker tags (style formats).
- Extracting text, such as warnings and cautions, from Interleaf/Quicksilver graphics frames.
- Replacing certain symbols that do not survive the export to IAF with character keys that will be changed back to the appropriate symbol in FrameMaker.
- Batch exporting of text and graphics.
- Reveal and hide text using affectivity. In FrameMaker parlance, effectively is known as conditional text. affectivity/conditional text is used to hide and reveal text.
- Autonumbers. In some cases, autonumbers come across as hard-coded text. This should be stripped out before exporting, unless tests show they come across as FrameMaker autonumbers.
Polishing the file in FrameMaker. Once the file has been prepped and exported out of Interleaf/Quicksilver, it is then brought into FrameMaker.
To reduce the tedium of converting, a scripting language is available for FrameMaker called FrameScript, which is available from Finite Matters Ltd. FrameScripts can automate repetitive tasks.
Areas where final cleanup may be needed:
- Untagged/rogue tagged text The Interleaf/Quicksilver author may have misapplied formatting information, and this will cause some text to appear without any formatting or with a format that is not part of the FrameMaker template. This text can be tagged with the appropriate FrameMaker style individually, or in batch mode with the global update options in FrameMaker.
- Graphics Imported graphics can be reimported into FrameMaker. Graphics drawn in Interleaf/Quicksilver can be more problematic.
The Filtrix conversion filters from Blueberry can be a great aid in covering graphics. Interleaf EPS graphics are passed through as EPS files to FrameMaker; Interleaf line drawings are converted to FrameMaker line drawings; and Interleaf raster image are converted to FrameMaker rasters.
Another technique is to export the graphic from Interleaf/Quicksilver as an Encapsulated PostScript (EPS) or PostScript® (PS) file. Acrobat Distiller® can turn EPS and PS files into Acrobat PDF files, which then can be edited by Adobe Illustrator® software.
Unlike bitmaps such as TIFF files, PDF files are vectors with smooth lines and text that can be more easily edited. - Tables Ad hoc use of ruling, shading and cell straddles (merging) can fool converters, which prefer regular patterns. Table Cleaner, a FrameScript from Carmen Publishing, removes custom ruling and shading and performs other useful functions. For more
information, see www.frameexpert.com. - Special symbols and equations Interleaf/Quicksilver has a unique font encoding scheme, which can trip up a converter when it tries to export a special symbol. These symbols should be replaced with a special character code (for example, SSS) and then the character code replaced with the symbol character in FrameMaker.
Equations are not supported by many filter applications, although FrameMaker includes an equation editor for recreating equations in documents. The time required to convert a document depends on many factors, including the complexity of the document, its length and the skill of the person performing the work.
Read moreStructured Documents?
A structured document is a document that can be viewed in several ways: as an author, a publisher, or a viewer. SGML, XML, and HTML are examples of structured documents. XML is used in this tutorial to demonstrate the Structured FrameMaker feature.
Structured documents, such as XML files, are created using elements. When working with XML files, the element definitions and structural information is stored in a Document Type Definition (DTD). When working with structured document in FrameMaker, the element definitions and structural information is stored in an Element Definitions Document (EDD). The EDD also contains formatting and style information. When you create a structured document in FrameMaker, you must associate an EDD to the document.
Changing the Product Interface
Before you begin working with structured documents, you must change the interface to Structured FrameMaker.
To change the interface:
- Open FrameMaker.
- Select File > Preferences > General
The Preferences dialog box appears.
- From the Product Interface pull-down menu, select Structured FrameMaker.
- Click Set.
- Close and restart FrameMaker.
Creating a Structured Document using a Standard Template
You cannot create a new structured document within FrameMaker without first creating an EDD. EDDs are usually created by an application developer and are outside the scope of this tutorial.
To create a structured document using a template:
- Select File > New > Document.
- Change to the Structured folder within the FrameMaker 7.0 directory.
- Select StrucBody.fm, and click New. The new document appears in the document window.
- Select File > Save to save your document.
Opening the Structure View
The Structure View provides a hierarchical representation of the document structure and shows the relationship of the elements that are currently used in the document.
To open the Structure View dialog box, click 
located on the right side of the document window.
The Structure View dialog box appears.
Opening the Element Catalog
The Element Catalog provides a list of all elements that are available for use within the structured document.
To open the Element Catalog and display all elements:
- Click
 located on the right side of the document window.
The Elements dialog box appears.
The Element Catalog contains the elements that are available for this document. Initially, the only elements that appear in the Element Catalog are the elements that can be inserted into the area in which the cursor is currently placed. - If you want to view all elements for the document, click Options located at the bottom of the Element Catalog.
The Set Available Elements dialog box appears.
Select All Elements, and then click Set.
All elements for the current document are displayed in the Element Catalog.
Displaying Element Boundaries as Tags
To display element tags:
- Place your cursor within the structured document.
- Select View > Element Boundaries (as Tags).The element tags appear in the document window.
- Place your cursor within various parts of the document.Notice that the list of valid elements within the Element Catalog change according to the location of your cursor. These elements are indicated by a check mark.
Inserting Elements and Attributes
When you place your cursor within the tags of a structured document, the list of valid elements change. These elements are displayed with a check mark within the Element Catalog. If you insert an element that is not valid, your document is no longer structured.
To insert elements:
- Place your cursor between Heading1 and FAQDoc.
- From the Element Catalog, select QApair, and click Insert.
The Attributes for New Element dialog box appears.
- In the Attribute Value list, highlight < no value > , and type 04142004.
Tip: Although this attribute is optional (see Type: Optional Unique ID in previous dialog box), it is good pratice to use the attribute value within a structured document. You can use this value to identify the segment of text when searching large documents. - Click Insert Element.
New element tags appear in the document window, and your cursor is automatically placed within the tags. - Within the new element tags, type What is the answer?
- Place your cursor between Question and QApair.
- From the Element Catalog, select Answer, and click Insert.
New element tags appear in the document window, and your cursor is automatically placed within the tags. - Type The answer is 42.
Validating a Structured Document
To verify the structure of your document, you must validate it. Validating your document ensures that all constraints defined for your document have been met. A document is not structured if does not pass validation.
To validate a structured document:
- Select Element > Validate.
The Element Validation dialog box appears. - From the Scope area, select Entire Document.
- Click Start Validating.
Within the Element Validation dialog box, notice the error message that is returned.
Within the document window, the cursor is placed at the point where the error occurs, and within the Structure View, a red box and an arrow appear at the point where the error occurs.
To make this document valid, elements must be added before the Heading1 tag. - Within the document window, make sure your cursor is placed before the Heading1 tag.
- From the Element Catalog, double-click MenuBar.
- Double-click Menu, and then double-click CrossRef.
The Cross-Reference dialog box appears. - From the Element Tags list, select QApair.
- From the Element (in Document Order) list, select What is the answer?
- Click Insert.
- Validate the document again by following the previous steps.
You should receive the following message indicating that your document is valid.
Saving a Structured Document as an XML file
The best way to save a structured document as an XML file using FrameMaker is to export the file into WebWorks Publisher Standard Edition. This application is shipped with FrameMaker, but installed separately. You must have WebWorks Publisher installed to complete this procedure.
To save a structured document as an XML file using WebWorks Publisher Standard Edition:
- With your document open, select File > WebWorks Publisher Standard Edition.The Project Launcher dialog box appears.
- From the Create a New Project area, select XML +CSS Standard Edition from the Using an existing WebWorks Publisher Project or Template pull-down menu.
- Click OK.
The New Project Wizard dialog box appears. - In the Please choose a name for this project box, type a name for the project.
- Click Next.
- Click Browse, and locate the file to convert.
- Click Next.
Tip: You can change the default mappings by selecting a row and then selecting a value from the pull-down menu. For this procedure, the default settings are used. - Click Next, and then click Finish.
A project window appears. - Within the project window, click the plus sign (+) next to your FrameMaker document.
An XML file appears beneath your FrameMaker document. - Double-click the file to display it in a browser window.
Structured Documents?
A structured document is a document that can be viewed in several ways: as an author, a publisher, or a viewer. SGML, XML, and HTML are examples of structured documents. XML is used in this tutorial to demonstrate the Structured FrameMaker feature.
Structured documents, such as XML files, are created using elements. When working with XML files, the element definitions and structural information is stored in a Document Type Definition (DTD). When working with structured document in FrameMaker, the element definitions and structural information is stored in an Element Definitions Document (EDD). The EDD also contains formatting and style information. When you create a structured document in FrameMaker, you must associate an EDD to the document.
Changing the Product Interface
Before you begin working with structured documents, you must change the interface to Structured FrameMaker.
To change the interface:
- Open FrameMaker.
- Select File > Preferences > General
The Preferences dialog box appears.
- From the Product Interface pull-down menu, select Structured FrameMaker.
- Click Set.
- Close and restart FrameMaker.
Creating a Structured Document using a Standard Template
You cannot create a new structured document within FrameMaker without first creating an EDD. EDDs are usually created by an application developer and are outside the scope of this tutorial.
To create a structured document using a template:
- Select File > New > Document.
- Change to the Structured folder within the FrameMaker 7.0 directory.
- Select StrucBody.fm, and click New. The new document appears in the document window.
- Select File > Save to save your document.
Opening the Structure View
The Structure View provides a hierarchical representation of the document structure and shows the relationship of the elements that are currently used in the document.
To open the Structure View dialog box, click
located on the right side of the document window.
The Structure View dialog box appears.
Opening the Element Catalog
The Element Catalog provides a list of all elements that are available for use within the structured document.
To open the Element Catalog and display all elements:
- Click located on the right side of the document window.
The Elements dialog box appears.
The Element Catalog contains the elements that are available for this document. Initially, the only elements that appear in the Element Catalog are the elements that can be inserted into the area in which the cursor is currently placed. - If you want to view all elements for the document, click Options located at the bottom of the Element Catalog.
The Set Available Elements dialog box appears.
Select All Elements, and then click Set.
All elements for the current document are displayed in the Element Catalog.
Displaying Element Boundaries as Tags
To display element tags:
- Place your cursor within the structured document.
- Select View > Element Boundaries (as Tags).The element tags appear in the document window.
- Place your cursor within various parts of the document.Notice that the list of valid elements within the Element Catalog change according to the location of your cursor. These elements are indicated by a check mark.
Inserting Elements and Attributes
When you place your cursor within the tags of a structured document, the list of valid elements change. These elements are displayed with a check mark within the Element Catalog. If you insert an element that is not valid, your document is no longer structured.
To insert elements:
- Place your cursor between Heading1 and FAQDoc.
- From the Element Catalog, select QApair, and click Insert.
The Attributes for New Element dialog box appears. - In the Attribute Value list, highlight < no value > , and type 04142004.
Tip: Although this attribute is optional (see Type: Optional Unique ID in previous dialog box), it is good pratice to use the attribute value within a structured document. You can use this value to identify the segment of text when searching large documents. - Click Insert Element.
New element tags appear in the document window, and your cursor is automatically placed within the tags. - Within the new element tags, type What is the answer?
- Place your cursor between Question and QApair.
- From the Element Catalog, select Answer, and click Insert.
New element tags appear in the document window, and your cursor is automatically placed within the tags. - Type The answer is 42.
Validating a Structured Document
To verify the structure of your document, you must validate it. Validating your document ensures that all constraints defined for your document have been met. A document is not structured if does not pass validation.
To validate a structured document:
- Select Element > Validate.
The Element Validation dialog box appears. - From the Scope area, select Entire Document.
- Click Start Validating.
Within the Element Validation dialog box, notice the error message that is returned.
Within the document window, the cursor is placed at the point where the error occurs, and within the Structure View, a red box and an arrow appear at the point where the error occurs.
To make this document valid, elements must be added before the Heading1 tag. - Within the document window, make sure your cursor is placed before the Heading1 tag.
- From the Element Catalog, double-click MenuBar.
- Double-click Menu, and then double-click CrossRef.
The Cross-Reference dialog box appears. - From the Element Tags list, select QApair.
- From the Element (in Document Order) list, select What is the answer?
- Click Insert.
- Validate the document again by following the previous steps.
You should receive the following message indicating that your document is valid.
Saving a Structured Document as an XML file
The best way to save a structured document as an XML file using FrameMaker is to export the file into WebWorks Publisher Standard Edition. This application is shipped with FrameMaker, but installed separately. You must have WebWorks Publisher installed to complete this procedure.
To save a structured document as an XML file using WebWorks Publisher Standard Edition:
- With your document open, select File > WebWorks Publisher Standard Edition.The Project Launcher dialog box appears.
- From the Create a New Project area, select XML +CSS Standard Edition from the Using an existing WebWorks Publisher Project or Template pull-down menu.
- Click OK.
The New Project Wizard dialog box appears. - In the Please choose a name for this project box, type a name for the project.
- Click Next.
- Click Browse, and locate the file to convert.
- Click Next.
Tip: You can change the default mappings by selecting a row and then selecting a value from the pull-down menu. For this procedure, the default settings are used. - Click Next, and then click Finish.
A project window appears. - Within the project window, click the plus sign (+) next to your FrameMaker document.
An XML file appears beneath your FrameMaker document. - Double-click the file to display it in a browser window.
Problems in FrameMaker 7 with CE fonts?
This paper is based on the platform Windows 2000/Windows XP, which supports the standard MS virtual font substitution mechanism for Non-Unicode applications. That means, the operating system supports automatically the display of a certain part of a big font, like "Arial CE", via enabling a specific country setting.
Using languages within FrameMaker
Adobe does not support FrameMaker for easter- and southern-european languages. Nevertheless it is possible to use for example a Greek font, but with restrictions:
- All dialog boxes remain in Latin-1 font, i.e. it’s not possible to type in Greek indices, to search/replace for Greek characters.
- No dictionary exist for specific languages.
The following characters are not usable within FrameMaker or are displayed the wrong way (font-depending): CE - Ź and ť
The following characters are not usable within FrameMaker (language-depending):
Using languages for creating PDF documents
- Create the postscript file using "Acrobat Distiller" driver and define the required PDF settings.
- Create the PDF file with Acrobat Distiller, using "UnicodeBookmarks" (enable prolog/epilogue, pay attention to the installation instructions, switch on language specific mapping table)
Result:
- The text is converted correctly, i.e. all characters, which are displayed in FM.
- Bookmark characters, which are non-western standard, are not converted correctly and may lead to corrupted bookmarks.
Problems coming up in bookmarks
With the default settings of FrameMaker 2 problems arise in the PDF file:
- Wrong font in bookmarks
The bookmark texts are converted 1:1 to the target font without transforming it to the language specific subset.
In other words: Acrobat uses as standard a Latin-1 font. It may also use a unicode font with subsets of language-specific character sets. This must be indicated via a special code (\376\377) at the beginning of a text.
FrameMaker does not pay attention to the source language font and converts all character according to its ANSI code instead of transforming it into the language-specific subset. - Wrong coding of characters
Two serious bugs occur in FrameMaker:- FrameMaker writes some characters the wrong way into the postscript file. This leads to wrong characters or corrupt bookmarks.
- In some cases 2 different source characters are mapped on the same target character in the postscript file! That means: The entries in the postscript file are wrong, the distiller is not able to distinguish that identical characters.
- Changes in Shlomos' configuration file 'Unicode.ini'
The PlugIn has to be configured, i.e. in the file 'Unicode.ini' a specific mapping table has to be created for mapping each source character to the correct target character.
TS_charset 182 <0389> put % capital letter ETA with Tonos
Migrating from Unstructured to Structured FrameMaker?
Implementing structured Adobe® FrameMaker® is both an opportunity and a challenge.
You can combine FrameMaker's powerful features with structured authoring to create a sophisticated workflow. Within this new authoring environment, you can automate formatting, create, edit, and publish XML-based content, and enforce required document structures.
The challenge is that building a structured workflow requires you to master new tools (such as the structure features in FrameMaker), new concepts (structured authoring), and new technology (XML, structure definitions, and perhaps Extensible Stylesheet Language (XSL) transformation). If you have no immediate need for XML, you can implement structure in FrameMaker without providing support for XML import or export.
How to scale tables to fit the text column width in FrameMaker?
About the script: Here is a simple script that proportionately scales a table to fit the text column that contains it. This script works with the current table but can be easily expanded to work with all of the tables in a document or book.
Getting the data: Click your cursor in a table that needs to be scaled. You will need to collect some basic information in order to scale the table correctly. Here is commented code to set the needed data into variables.
// The selected table.
Set vTbl = SelectedTbl;
// The current width of the table.
Set vTblWidth = vTbl.TblWidth;
// The width of the column containing the table.
Set vColWidth = vTbl.TextLoc.Object.InTextObj.Width;
The vColWidth variable is the width of the column in a multi-column text frame. If the text frame only has one column, the column width is equal to the text frame width. If you have multiple columns, but want to scale the table to the width of the text frame, use the following lines in place of the last two lines above.
// The width of the text frame containing the table.
Set vColWidth = vTbl.TextLoc.Object.InTextFrame.Width;
Now, the script can do some math to figure out much to scale the table.
// Divide the column width by the table width.
Set vScaleFactor = vColWidth / vTblWidth;
How to scale the table?
The table's TblWidth property is read only, so you cannot use this to scale the table.
// This won't work.
Set vTbl.TblWidth = vTblWidth * vScaleFactor;
Instead, you have to change the width of each individual column of the table. These widths are stored in a MetricList called TblColWidths.
// Set a variable for the table column widths.
Set vWidths = vTbl.TblColWidths;
A metric list is a list of measurement values. In this case, there is a member of the list for each column in the table. If the table has five columns, the TblColWidth list will contain five members.
The key to the script is to loop through the list of measurements, multiply each one by vScaleFactor and put the new value back in the list.
// Loop through the list and calculate each
// table column's new width.
Loop While(vCounter <= vWidths.Count) LoopVar(vCounter)
Init(1) Incr(1)
Get Member Number(vCounter) From(vWidths) NewVar(vWidth);
Set vNewWidth = vWidth * vScaleFactor;
Replace Member Number(vCounter) In(vWidths) With(vNewWidth);
EndLoop
The vCounter variable will increment by 1 (Incr(1)) starting at 1 (Init(1)) through the number of members in vWidths (vWidths.Count). Each member will be multiplied by the scale factor, and the member will be replaced with the new value.
Your vWidths MetricList variable now contains the correct widths to scale the table to the column width. The only thing left to do is assign the new values to the table.
Set vTbl.TblColWidths = vWidths;
How to insert cross references?
There are two types of cross-references in FrameMaker: spot cross-references and paragraph cross-references. (There is a third type, element cross-references, available only in FrameMaker+SGML. This tutorial will not discuss element cross-references). Both paragraph and spot cross-references are similar, in that you have to insert an Xref object that points to a Cross-Ref Marker. The Xref object has an XRefSrcText property that must exactly match the marker text of the Cross-Ref Marker. Let's start with spot cross-references, since they are a little simpler to work with.
Spot cross-references
As an example, here is a table that contains the names of maintenance procedures that occur in a document. We want to use FrameScript to make cross-references from the entries in the table to the actual procedures in the document. Each procedure title uses a Heading2 paragraph format.
Adding cross reference markers
One principle we like to add here when solving problems with FrameScript, is to break down the problem into small tasks. Our first task is to put cross-reference markers in each procedure heading paragraph. Since we know that procedures start with Heading2 paragraphs, we will only put markers in those paragraphs. The marker text will be set to the text of the paragraph. It is important that each cross-reference marker in the document contains unique text. We will assume in our example that each Heading2 paragraph contains text that is unique from all other Heading2 paragraphs in the document.
// Test for an active document.
If ActiveDoc = 0
MsgBox 'No active document. ';
LeaveSub;
Else
Set vCurrentDoc = ActiveDoc;
EndIf
Loop ForEach(Pgf) In(vCurrentDoc) LoopVar(vPgf)
If vPgf.Name = 'Heading2'
New Marker NewVar(vMarker) MarkerName('Cross-Ref')
TextLoc(vPgf);
// Set the marker text to the paragraph text.
Set vMarker.MarkerText = vPgf.Text;
EndIf
EndLoop
Each Heading2 paragraph will have a cross-reference marker at the beginning of it with the text of the paragraph as the marker text. Here is one of the Heading2 paragraphs with the marker window showing the marker text.
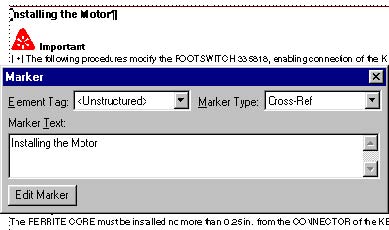
Because we are creating markers with FrameScript instead of the FrameMaker interface, let's take a look at the marker properties. You can run the following code with the marker anchor selected to see the marker's properties. Notice that the MarkerText property is the text that shows in the Marker dialog.
Get TextList InRange(TextSelection) MarkerAnchor
NewVar(vTextList);
If vTextList.Count > 0
Get Member Number(1) From(vTextList) NewVar(vMarker);
Set vMarker = vMarker.TextData;
Display vMarker.Properties;
Else
MsgBox 'There is no marker selected. ';
EndIf
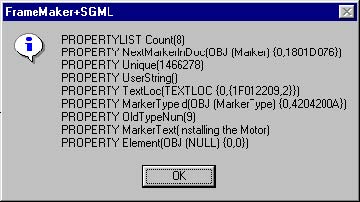
Adding the cross-references
Now we can go to the table and have a script add cross-references to the markers ("spots") we inserted earlier. We will assume that the cursor is in the table when the following code is run.
// Test for an active document.
If ActiveDoc = 0
MsgBox 'There is no active document. ';
LeaveSub;
Else
Set vCurrentDoc = ActiveDoc;
EndIf
// Set a variable for the current table.
Set vTbl = vCurrentDoc.SelectedTbl;
// Make sure a the cursor is in a table.
If vTbl.ObjectName not= 'Tbl'
MsgBox 'There is no selected table. ';
LeaveSub; // Exit the script.
EndIf
// Find the first body row in the table.
Set vRow = vTbl.FirstRowInTbl;
Loop While(vRow.RowType = RowHeading)
Set vRow = vRow.NextRowInTbl;
EndLoop
// Go to the first cell in the first body row.
Set vCell = vRow.FirstCellInRow;
Now that we are in the first cell, we can begin a loop down through the cells. For each cell, we need to "select" the text so that the new cross-reference can replace it. The XRefSrcText property of the XRef (cross-reference) will be set to the selected text since this will match the marker text of the corresponding cross-reference marker that was inserted earlier. To select the text, we will make a text range, delete the text, and then insert the XRef object in its place.
// Begin the loop.
Loop While(vCell)
// Select the text by making a TextRange.
New TextRange NewVar(vTextRange) Object(vCell.FirstPgf)
Offset(0) Offset(ObjEndOffset-1);
// Set a variable for the TextRange text.
Set vXRefSrcText = vTextRange.Text;
// Delete the text.
Delete Text TextRange(vTextRange);
// Insert the cross-reference.
New XRef Format('Heading & Page') TextLoc(vCell.FirstPgf)
NewVar(vXRef);
Set vXRef.XRefSrcText = vXRefSrcText;
// Go to the next cell and repeat the loop.
Set vCell = vCell.CellBelowInCol;
EndLoop
// Update the cross-references.
Update DocObject(vCurrentDoc) XRefs Everything;
The table now shows the original text replaced with the cross-references. If you double-click on one of the cross-references, it will open the Cross-Reference dialog box as shown below.
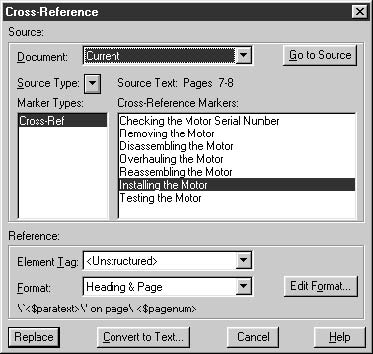
The key thing to remember is that the XRef.XRefSrcText property must exactly match the XRef.MarkerText property of the corresponding marker otherwise, you will have an unresolved cross-reference. To see the cross-reference properties, highlight one of the cross-references and run the following code. Notice the XRefSrcText property.
Get TextList InRange(TextSelection) XRefBegin
NewVar(vTextList);
If vTextList.Count > 0
Get Member Number(1) From(vTextList) NewVar(XRefBegin);
Set XRefBegin = XRefBegin.TextData;
Display XRefBegin.Properties;
Else
MsgBox 'There is no cross-reference selected. ';
EndIf
Cross-references to other documents
One other important property to note is the XRefFile property. For the above cross-reference it is a NULL string because it is an internal cross-reference. If we were cross-referencing another file, then the XRefFile property would contain the absolute path to the other file.
Paragraph cross-references
Before discussing the insertion of paragraph cross-references with FrameScript, let's review how they differ from spot cross-references in the FrameMaker interface. When you insert a spot cross-reference with FrameMaker, you have to insert a cross-reference marker before you insert the cross-reference. You have to make a "spot" that will appear in the Cross-Reference dialog box.
In contrast, paragraph cross-references don’t require the insertion of a cross-reference marker ahead of time. Instead, you point to the desired paragraph in the Cross-Reference dialog box, click Insert, and FrameMaker inserts the cross-reference and the cross-reference marker in the appropriate places.
Once inserted, spot and paragraph cross-references don't differ in their basic underlying properties. All cross-references are accessed as XRef objects by FrameScript. There is a difference, however, in the way they are presented in the FrameMaker Cross-Reference dialog box. When you double-click on a spot cross-reference, the dialog shows Cross-Ref markers under the Source Type and marker text in the right-hand list. Double-clicking a paragraph cross-reference shows the Paragraph Tag of the source paragraph under Source Type and the paragraph text each of the selected Paragraph Tag paragraphs in the right-hand list. Below is the Cross-Reference dialog box showing a paragraph cross-reference.
The difference between the cross-reference types comes from a difference in the syntax of the cross-reference markers. To see this, insert a paragraph cross-reference, Control-Alt-Click on the cross-reference to go to the source, and open the marker window. You will see the syntax of the marker that FrameMaker inserts with a paragraph cross-reference. Below is a sample marker window followed by the XRef properties.
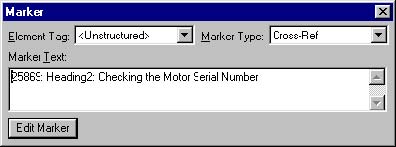
Like the spot cross-reference markers we inserted earlier, you can see the text of the source paragraph in the marker window and the XRefSrcText property. In addition, the paragraph text is preceded by a five-digit number (followed by a colon and space), and the name of the paragraph format of the source paragraph (followed by a colonm and space). It is these two additional components in the XRefSrcText property of the XRef that causes FrameMaker to "see" this as a paragraph cross-reference.
Keeping cross-ref markers unique
There is another reason for the different syntax between paragraph and spot cross-references. It is essential that Cross-Ref markers within a document are unique. While you can have more than one cross-reference pointing to a single Cross-Ref marker, you can't have a single cross-reference trying to point to more than one marker with the same marker text. When you insert spot cross-references, it is up to you to make sure that each Cross-Ref marker is unique. When you insert paragraph cross-references, FrameMaker makes sure the markers it inserts are unique by using the special syntax, particularly the five-digit serial number on the front.
The cross-ref marker text should never be changed after the markers are inserted. You could have several cross-references pointing to the same marker; if you change the marker text, the cross-references would become unresolved. Likewise, changing the text of the source paragraph will not change the marker text.
Before writing some code to insert paragraph cross-references, here are the important points to remember about both paragraph and spot cross-references.
- A resolved cross-reference will have an XRefSrcText string value that exactly matches the MarkerText string value of a Cross-Ref marker.
- Both types of cross-references are functionally the same; they are only presented differently in the FrameMaker Cross-Reference dialog box.
- Cross-Ref marker text should always be unique within a document for both types of cross-references.
- The text of a Cross-Ref marker should never be changed, even if the paragraph tag or text of its paragraph changes.
Adding paragraph cross-references
We will use the same example we used with spot cross-references, except this time we will insert the cross-references and its corresponding marker at the same time. In our previous example, we inserted all of the markers first and then the cross-references. We assumed that for every entry in the table, there would be an exactly matching Heading2 paragraph in the document. This might not always be a safe assumption and could result in unresolved cross-references.
We will start with our loop through the table. The entire code listing is below.
// Test for an active document.
If ActiveDoc = 0
MsgBox 'There is no active document. ';
LeaveSub;
Else
Set vCurrentDoc = ActiveDoc;
EndIf
// Set a variable for the current table.
Set vTbl = vCurrentDoc.SelectedTbl;
// Make sure a the cursor is in a table.
If vTbl.ObjectName not= 'Tbl'
MsgBox 'There is no selected table. ';
LeaveSub; // Exit the script.
EndIf
// Make a property list for the color red.
Get Object Type(Color) Name('Red') DocObject(vCurrentDoc)
NewVar(vColor);
New PropertyList NewVar(vProps) Color(vColor);
// Find the first body row in the table.
Set vRow = vTbl.FirstRowInTbl;
Loop While(vRow.RowType = RowHeading)
Set vRow = vRow.NextRowInTbl;
EndLoop
// Go to the first cell in the first body row.
Set vCell = vRow.FirstCellInRow;
// Begin the loop.
Loop While(vCell)
// Select the text by making a TextRange.
New TextRange NewVar(vTextRange) Object(vCell.FirstPgf)
Offset(0) Offset(ObjEndOffset-1);
// Set a variable for the TextRange text.
Set vXRefSrcText = vTextRange.Text;
// Run a subroutine to find the corresponding
heading.
Set vHeadingFound = 0;
Run FindSourceHeading Returns vMarkerText(vXRefSrcText);
If vHeadingFound = 1
// Delete the text.
Delete Text TextRange(vTextRange);
// Insert the cross-reference.
New XRef Format('Heading & Page') TextLoc(vCell.FirstPgf)
NewVar(vXRef);
Set vXRef.XRefSrcText = vXRefSrcText;
Else
// If the corresponding heading can’t be found, color the
// text red so it stands out.
Apply TextProperties TextRange(vTextRange)
Properties(vProps);
EndIf
// Go to the next cell and repeat the loop.
Set vCell = vCell.CellBelowInCol;
EndLoop
// Update the cross-references.
Update DocObject(vCurrentDoc) XRefs Everything;
For each entry in the table, we are going to run a subroutine called FindSourceHeading that attempts to locate the corresponding heading in the document. If it doesn't find a corresponding head with the same text, it will apply the color red to the text in the table cell so you can easily know that there is a problem. Here is the code listing for the subroutine.
Sub FindSourceHeading
//
Loop ForEach(Pgf) In(vCurrentDoc) LoopVar(vPgf)
If vPgf.Name = 'Heading2'
// See if the paragraph text is the same as the table
// cell text.
If vPgf.Text = vXRefSrcText
// Make marker text with paragraph cross-ref syntax.
// Get the unique Id of the paragraph and convert it to
// a string.
New String NewVar(vMarkerText) Value(vPgf.Unique);
// Drop the first character so we end up with 5 digits.
Get String FromString(vMarkerText) NewVar(vMarkerText)
StartPos(vMarkerText.Size - 4);
// Add the paragraph tag and text.
Set vMarkerText = vMarkerText + ': ' + vPgf.Name + ': ' +
vPgf.Text;
// Add the cross-reference marker.
New Marker NewVar(vMarker) MarkerName('Cross-Ref')
TextLoc(vPgf);
// Set the marker text to the paragraph text.
Set vMarker.MarkerText = vMarkerText;
// Set the vHeadingFound variable to 1.
Set vHeadingFound = 1;
// Leave the subroutine.
LeaveSub;
EndIf
EndIf
EndLoop
//
EndSub
Notice that this code is similar to the earlier script that inserted the spot cross reference markers. It is a simple loop through the document's paragraphs looking for Heading2 paragraphs. It has an addition test to see if the paragraph's text matches the text of the table cell.
How to insert cross references?
There are two types of cross-references in FrameMaker: spot cross-references and paragraph cross-references. (There is a third type, element cross-references, available only in FrameMaker+SGML. This tutorial will not discuss element cross-references). Both paragraph and spot cross-references are similar, in that you have to insert an Xref object that points to a Cross-Ref Marker. The Xref object has an XRefSrcText property that must exactly match the marker text of the Cross-Ref Marker. Let's start with spot cross-references, since they are a little simpler to work with.
Spot cross-references
As an example, here is a table that contains the names of maintenance procedures that occur in a document. We want to use FrameScript to make cross-references from the entries in the table to the actual procedures in the document. Each procedure title uses a Heading2 paragraph format.
Adding cross reference markers
One principle we like to add here when solving problems with FrameScript, is to break down the problem into small tasks. Our first task is to put cross-reference markers in each procedure heading paragraph. Since we know that procedures start with Heading2 paragraphs, we will only put markers in those paragraphs. The marker text will be set to the text of the paragraph. It is important that each cross-reference marker in the document contains unique text. We will assume in our example that each Heading2 paragraph contains text that is unique from all other Heading2 paragraphs in the document.
// Test for an active document.
If ActiveDoc = 0
MsgBox 'No active document. ';
LeaveSub;
Else
Set vCurrentDoc = ActiveDoc;
EndIf
Loop ForEach(Pgf) In(vCurrentDoc) LoopVar(vPgf)
If vPgf.Name = 'Heading2'
New Marker NewVar(vMarker) MarkerName('Cross-Ref')
TextLoc(vPgf);
// Set the marker text to the paragraph text.
Set vMarker.MarkerText = vPgf.Text;
EndIf
EndLoop
Each Heading2 paragraph will have a cross-reference marker at the beginning of it with the text of the paragraph as the marker text. Here is one of the Heading2 paragraphs with the marker window showing the marker text.
Because we are creating markers with FrameScript instead of the FrameMaker interface, let's take a look at the marker properties. You can run the following code with the marker anchor selected to see the marker's properties. Notice that the MarkerText property is the text that shows in the Marker dialog.
Get TextList InRange(TextSelection) MarkerAnchor
NewVar(vTextList);
If vTextList.Count > 0
Get Member Number(1) From(vTextList) NewVar(vMarker);
Set vMarker = vMarker.TextData;
Display vMarker.Properties;
Else
MsgBox 'There is no marker selected. ';
EndIf
Adding the cross-references
Now we can go to the table and have a script add cross-references to the markers ("spots") we inserted earlier. We will assume that the cursor is in the table when the following code is run.
// Test for an active document.
If ActiveDoc = 0
MsgBox 'There is no active document. ';
LeaveSub;
Else
Set vCurrentDoc = ActiveDoc;
EndIf
// Set a variable for the current table.
Set vTbl = vCurrentDoc.SelectedTbl;
// Make sure a the cursor is in a table.
If vTbl.ObjectName not= 'Tbl'
MsgBox 'There is no selected table. ';
LeaveSub; // Exit the script.
EndIf
// Find the first body row in the table.
Set vRow = vTbl.FirstRowInTbl;
Loop While(vRow.RowType = RowHeading)
Set vRow = vRow.NextRowInTbl;
EndLoop
// Go to the first cell in the first body row.
Set vCell = vRow.FirstCellInRow;
Now that we are in the first cell, we can begin a loop down through the cells. For each cell, we need to "select" the text so that the new cross-reference can replace it. The XRefSrcText property of the XRef (cross-reference) will be set to the selected text since this will match the marker text of the corresponding cross-reference marker that was inserted earlier. To select the text, we will make a text range, delete the text, and then insert the XRef object in its place.
// Begin the loop.
Loop While(vCell)
// Select the text by making a TextRange.
New TextRange NewVar(vTextRange) Object(vCell.FirstPgf)
Offset(0) Offset(ObjEndOffset-1);
// Set a variable for the TextRange text.
Set vXRefSrcText = vTextRange.Text;
// Delete the text.
Delete Text TextRange(vTextRange);
// Insert the cross-reference.
New XRef Format('Heading & Page') TextLoc(vCell.FirstPgf)
NewVar(vXRef);
Set vXRef.XRefSrcText = vXRefSrcText;
// Go to the next cell and repeat the loop.
Set vCell = vCell.CellBelowInCol;
EndLoop
// Update the cross-references.
Update DocObject(vCurrentDoc) XRefs Everything;
The table now shows the original text replaced with the cross-references. If you double-click on one of the cross-references, it will open the Cross-Reference dialog box as shown below.
The key thing to remember is that the XRef.XRefSrcText property must exactly match the XRef.MarkerText property of the corresponding marker otherwise, you will have an unresolved cross-reference. To see the cross-reference properties, highlight one of the cross-references and run the following code. Notice the XRefSrcText property.
Get TextList InRange(TextSelection) XRefBegin
NewVar(vTextList);
If vTextList.Count > 0
Get Member Number(1) From(vTextList) NewVar(XRefBegin);
Set XRefBegin = XRefBegin.TextData;
Display XRefBegin.Properties;
Else
MsgBox 'There is no cross-reference selected. ';
EndIf
Cross-references to other documents
One other important property to note is the XRefFile property. For the above cross-reference it is a NULL string because it is an internal cross-reference. If we were cross-referencing another file, then the XRefFile property would contain the absolute path to the other file.
Paragraph cross-references
Before discussing the insertion of paragraph cross-references with FrameScript, let's review how they differ from spot cross-references in the FrameMaker interface. When you insert a spot cross-reference with FrameMaker, you have to insert a cross-reference marker before you insert the cross-reference. You have to make a "spot" that will appear in the Cross-Reference dialog box.
In contrast, paragraph cross-references don’t require the insertion of a cross-reference marker ahead of time. Instead, you point to the desired paragraph in the Cross-Reference dialog box, click Insert, and FrameMaker inserts the cross-reference and the cross-reference marker in the appropriate places.
Once inserted, spot and paragraph cross-references don't differ in their basic underlying properties. All cross-references are accessed as XRef objects by FrameScript. There is a difference, however, in the way they are presented in the FrameMaker Cross-Reference dialog box. When you double-click on a spot cross-reference, the dialog shows Cross-Ref markers under the Source Type and marker text in the right-hand list. Double-clicking a paragraph cross-reference shows the Paragraph Tag of the source paragraph under Source Type and the paragraph text each of the selected Paragraph Tag paragraphs in the right-hand list. Below is the Cross-Reference dialog box showing a paragraph cross-reference.
The difference between the cross-reference types comes from a difference in the syntax of the cross-reference markers. To see this, insert a paragraph cross-reference, Control-Alt-Click on the cross-reference to go to the source, and open the marker window. You will see the syntax of the marker that FrameMaker inserts with a paragraph cross-reference. Below is a sample marker window followed by the XRef properties.
Like the spot cross-reference markers we inserted earlier, you can see the text of the source paragraph in the marker window and the XRefSrcText property. In addition, the paragraph text is preceded by a five-digit number (followed by a colon and space), and the name of the paragraph format of the source paragraph (followed by a colonm and space). It is these two additional components in the XRefSrcText property of the XRef that causes FrameMaker to "see" this as a paragraph cross-reference.
Keeping cross-ref markers unique
There is another reason for the different syntax between paragraph and spot cross-references. It is essential that Cross-Ref markers within a document are unique. While you can have more than one cross-reference pointing to a single Cross-Ref marker, you can't have a single cross-reference trying to point to more than one marker with the same marker text. When you insert spot cross-references, it is up to you to make sure that each Cross-Ref marker is unique. When you insert paragraph cross-references, FrameMaker makes sure the markers it inserts are unique by using the special syntax, particularly the five-digit serial number on the front.
The cross-ref marker text should never be changed after the markers are inserted. You could have several cross-references pointing to the same marker; if you change the marker text, the cross-references would become unresolved. Likewise, changing the text of the source paragraph will not change the marker text.
Before writing some code to insert paragraph cross-references, here are the important points to remember about both paragraph and spot cross-references.
- A resolved cross-reference will have an XRefSrcText string value that exactly matches the MarkerText string value of a Cross-Ref marker.
- Both types of cross-references are functionally the same; they are only presented differently in the FrameMaker Cross-Reference dialog box.
- Cross-Ref marker text should always be unique within a document for both types of cross-references.
- The text of a Cross-Ref marker should never be changed, even if the paragraph tag or text of its paragraph changes.
Adding paragraph cross-references
We will use the same example we used with spot cross-references, except this time we will insert the cross-references and its corresponding marker at the same time. In our previous example, we inserted all of the markers first and then the cross-references. We assumed that for every entry in the table, there would be an exactly matching Heading2 paragraph in the document. This might not always be a safe assumption and could result in unresolved cross-references.
We will start with our loop through the table. The entire code listing is below.
// Test for an active document.
If ActiveDoc = 0
MsgBox 'There is no active document. ';
LeaveSub;
Else
Set vCurrentDoc = ActiveDoc;
EndIf
// Set a variable for the current table.
Set vTbl = vCurrentDoc.SelectedTbl;
// Make sure a the cursor is in a table.
If vTbl.ObjectName not= 'Tbl'
MsgBox 'There is no selected table. ';
LeaveSub; // Exit the script.
EndIf
// Make a property list for the color red.
Get Object Type(Color) Name('Red') DocObject(vCurrentDoc)
NewVar(vColor);
New PropertyList NewVar(vProps) Color(vColor);
// Find the first body row in the table.
Set vRow = vTbl.FirstRowInTbl;
Loop While(vRow.RowType = RowHeading)
Set vRow = vRow.NextRowInTbl;
EndLoop
// Go to the first cell in the first body row.
Set vCell = vRow.FirstCellInRow;
// Begin the loop.
Loop While(vCell)
// Select the text by making a TextRange.
New TextRange NewVar(vTextRange) Object(vCell.FirstPgf)
Offset(0) Offset(ObjEndOffset-1);
// Set a variable for the TextRange text.
Set vXRefSrcText = vTextRange.Text;
// Run a subroutine to find the corresponding
heading.
Set vHeadingFound = 0;
Run FindSourceHeading Returns vMarkerText(vXRefSrcText);
If vHeadingFound = 1
// Delete the text.
Delete Text TextRange(vTextRange);
// Insert the cross-reference.
New XRef Format('Heading & Page') TextLoc(vCell.FirstPgf)
NewVar(vXRef);
Set vXRef.XRefSrcText = vXRefSrcText;
Else
// If the corresponding heading can’t be found, color the
// text red so it stands out.
Apply TextProperties TextRange(vTextRange)
Properties(vProps);
EndIf
// Go to the next cell and repeat the loop.
Set vCell = vCell.CellBelowInCol;
EndLoop
// Update the cross-references.
Update DocObject(vCurrentDoc) XRefs Everything;
For each entry in the table, we are going to run a subroutine called FindSourceHeading that attempts to locate the corresponding heading in the document. If it doesn't find a corresponding head with the same text, it will apply the color red to the text in the table cell so you can easily know that there is a problem. Here is the code listing for the subroutine.
Sub FindSourceHeading
//
Loop ForEach(Pgf) In(vCurrentDoc) LoopVar(vPgf)
If vPgf.Name = 'Heading2'
// See if the paragraph text is the same as the table
// cell text.
If vPgf.Text = vXRefSrcText
// Make marker text with paragraph cross-ref syntax.
// Get the unique Id of the paragraph and convert it to
// a string.
New String NewVar(vMarkerText) Value(vPgf.Unique);
// Drop the first character so we end up with 5 digits.
Get String FromString(vMarkerText) NewVar(vMarkerText)
StartPos(vMarkerText.Size - 4);
// Add the paragraph tag and text.
Set vMarkerText = vMarkerText + ': ' + vPgf.Name + ': ' +
vPgf.Text;
// Add the cross-reference marker.
New Marker NewVar(vMarker) MarkerName('Cross-Ref')
TextLoc(vPgf);
// Set the marker text to the paragraph text.
Set vMarker.MarkerText = vMarkerText;
// Set the vHeadingFound variable to 1.
Set vHeadingFound = 1;
// Leave the subroutine.
LeaveSub;
EndIf
EndIf
EndLoop
//
EndSub
Notice that this code is similar to the earlier script that inserted the spot cross reference markers. It is a simple loop through the document's paragraphs looking for Heading2 paragraphs. It has an addition test to see if the paragraph's text matches the text of the table cell.
Troubleshoot exporting PDF using Adobe FrameMaker?
If you can create a PDF file from another application using Acrobat Distiller, there may be a problem with FrameMaker. Perform the tasks in this section to determine if FrameMaker causes the problem.
1. Set Adobe PDF or the Acrobat Distiller printer as the default printer. Then, try to create a PDF file in FrameMaker.
- Choose Start > Printers and Faxes (Windows 2000 and XP) or Printers (Windows 98 and Me).
- Right-click the Adobe PDF or Acrobat Distiller printer and choose Set As Default Printer.
- In FrameMaker, choose File > Print, and then click Print.
2. If you use Save As PDF to create PDF files, print to the Adobe PDF printer.
- In FrameMaker, choose File > Print.
- Click Setup, choose Adobe PDF or Acrobat Distiller for your printer, and then click OK.
- Click Print.
3. Deselect Generate Acrobat Data in the Print Document dialog box.
PDF features, such as bookmarks, hyperlinks, and tags, may cause problems with the creation of PDF files. Disable these features to determine if they cause the problem.
- In FrameMaker, choose File > Print.
- Deselect Generate Acrobat Data, and then click Print.
4. Try printing with a different job option.
To determine if corrupt job options are the cause, select a different job option when you print in FrameMaker. If you're able to create a PDF file using a different job option, troubleshoot the problem job option in Acrobat Distiller by changing each setting and printing until you find the setting that causes the problem.
To select a different job option in FrameMaker:
- Choose File > Print.
- Click PDF Setup.
- Click the Settings tab, choose a different job option from the PDF Job Options menu, and click Set.
- Click Print:
To troubleshoot job options in Acrobat Distiller:
-- Acrobat Distiller 6.0 and 7.0:
- Start Acrobat Distiller and choose the problem job option from the Default Settings menu.
- Choose Settings > Edit Adobe PDF Settings.
- Change a setting and then print.
- Repeat steps 1-3 until you find the problem setting.
-- Acrobat Distiller 5.0:
- Start Acrobat Distiller and choose the problem job option in the Job Options box.
- Choose Settings > Job Options.
- Change a setting and then print.
- Repeat steps 1-3 until you find the problem setting.
5. Create a PDF file from a new FrameMaker file.
If the new file doesn't print, remove and reinstall FrameMaker and Distiller. If Acrobat is installed, remove and reinstall it by using the Add/Remove Programs Control Panel. For further assistance, contact Adobe Technical Support.
Japanese Publishing with Adobe FrameMaker 7.0?
Japanese users as well as multinational business users can take full advantage of the sophisticated Japanese publishing features in Adobe® FrameMaker® 7.0 software. The ability to define "combined" fonts of western and Japanese characters in the same document, integrated Japanese menus and messages, and composition rules are just a few features in FrameMaker 7.0. Targeted for Japanese authors and workgroups who need to create business-critical documents-such as product documentation, engineering specifications, work instructions, catalogs, manuals, and policies and procedures-FrameMaker is both flexible and powerful.
FrameMaker users, such as multinational companies needing to exchange information with their business partners in Japan, do not have to purchase a special Japanese version of FrameMaker. Users can access the Japanese features of FrameMaker 7.0 with a familiar user interface as long as a Japanese operating system is installed. Documents created in these western operating system environments can be directly opened and edited in the Japanese environment, and then printed, distributed, and translated.
Japanese characters
Traditionally, Japanese is written vertically starting in the upper-right-hand corner. Japanese can also be written horizontally and from left to right. A growing number of publications follow the left-to-right, top-to bottom western style. This is particularly true for professional publications.
Japanese character systems
The Japanese script is a mixture of three different systems called kanji, hiragana, and katakana. Hiragana and katakana are known collectively as "kana".
Kanji, adopted from the Chinese, consists of the basic ideograms or characters, each representing one word. To date, there are more than 8000 kanji characters that constitute more than 300,000 words.
Hiragana characters are used for words of Japanese origin. Hiragana characters are often used for particles (such as to, at, and other prepositions) that designate subject or object and for endings or words spelled in kanji.
Katakana, a more squared-off character set, duplicates the same set of sounds that exist for hiragana, but katakana is often used for writing English and other foreign words and names-similar to a shorthand system.
Japanese text input
Front-end processor
The most widely used method for entering Japanese characters is via built-in or third-party software that allows text to be entered by typing the word phonetically at the keyboard (usually using Roman letters). The user then searches via the software for the proper kanji character because many characters have the same pronunciation.
This input software is called a front-end processor (FEP) or, sometimes, an input method editor (IME).
Japanese double-byte character sets
Because there are so many Japanese characters, it is impossible to represent them all with a single 7-bit or 8-bit data type. The Japan Industrial Standard (JIS) Committee (the Japanese equivalent of ANSI) has established a standard character set, known as JIS X208, that determines the characters to be defined and the code to be assigned to the characters. There are at least three distinct encodings for JIS X208:
JIS Operates in a 7-bit environment and supports single-byte ASCII as well as two-byte Japanese characters by using special character sequences that begin with the "escape" (ESC) character.
Shift-JIS Operates in an 8-bit environment and is the native Japanese encoding on Windows® and Mac OS platforms.
EUC (Extended Unix Code) Operates in an 8-bit environment and is widely used on UNIX® platforms.
Shift-JIS versus Unicode
Unicode is a fixed-width, 16-bit character set that covers most of the world's written languages that are in current or expected use in computers. Since type families are generally designed and limited to a particular writing system, a software program still needs type family, language, and formatting information. FrameMaker 7.0 uses Shift-JIS as its internal encoding system for Japanese so users can take advantage of large and growing font sets as well as the tools that extend and manipulate fonts.
Using FrameMaker 7.0 for Japanese publishing
FrameMaker 7.0 includes the ability to create Japanese language documents — all you need is a Japanese operating system to input and display Japanese text. In the Mac OS environment, users can add Japanese capabilities to a western operating system.
Japanese character support and fonts
FrameMaker 7.0 software supports the most popular Japanese text encodings (JIS, Shift-JIS, and EUC) so that workgroup users can exchange text files on various platforms with different formats. FrameMaker also supports Enhanced Type 1 fonts as well as TrueType fonts on Windows and Mac OS platforms.
Inline input
FrameMaker 7.0 supports in-line or on-the-spot input, which allows users to directly type Japanese characters in a WYSIWYG environment instead of creating text in a separate window and placing it on the page. Users can use any compatible FEP or IME of their choice.
Rubi
Rubi characters are very small characters that appear above other characters. Rubi characters annotate characters by indicating their pronunciation or by augmenting their meanings. FrameMaker 7.0 provides precise typographical control of rubi characters and supports in-line input which very few applications offer.
Combined fonts
It is common in technical documentation to mix Japanese and western characters in the same Japanese document. For example, western characters are used for product names, numbers, and the names of people.
FrameMaker 7.0 software allows users to create custom "combined" fonts. When a combined font is used, western characters are displayed using the western fonts, and Japanese characters are displayed using Japanese fonts. This allows users to include both Japanese and western fonts in a line of text, retaining a consistent look as well as the proper proportions for both fonts.
Line breaking and hyphenation (composition rules)
FrameMaker 7.0 complies with Japanese publishing standards by supporting Kumihan (Japanese composition) rules for line breaking and hyphenating text. FrameMaker also allows fine-grain customization of these rules to conform to corporate typographic standards.
Variables
FrameMaker 7.0 supports both Japanese and western country-specific notations of dates, including the use of native Japanese imperial and kanji dates and pages in documents.
Autonumbering
FrameMaker 7.0 software includes 10 types of Japanese autonumbering. This feature adds automatic Japanese numbering for volumes, chapters, paragraphs, footnotes, and pages, letting users easily create and maintain numbering for headings, sections, illustrations, tables, figures, and footnotes.
Autonumber building blocks
It may appear that three Zenkaku numbering styles are identical to several of the existing paragraph numbering options available in western-language versions of FrameMaker today. But these styles are indeed different: They are fixed width, while the western text equivalents are not fixed width so will not suit the needs of users who are manipulating Japanese text.
Index sorting
For Japanese text, kana and kanji characters are sorted by "yomi-gana", which means pronunciation. The rest of the characters that are symbol characters are usually sorted by code value. The typical sorting order is symbols, numerics, Roman alphabetical, kana characters, Japanese symbol characters, and kanji characters.
FrameMaker 7.0 provides the ability to sort Japanese and western characters to automatically and simply produce indexes.
Color libraries
FrameMaker 7.0 software includes DIC Color Guide for spot colors, and Toyo™ Color Finder with more than 1,000 colors based on the most common printing inks in Japan. In addition, Tombo crop marks are available when printing for proper registration.
Index sorting
For Japanese text, kana and kanji characters are sorted by "yomi-kana", which means pronunciation. FrameMaker automatically recognizes the pronunciation of kana and sorts them correctly. For kanji, a user needs to provide pronunciation using kana in Marker dialog, so that kanji characters are sorted correctly by pronunciation.
The typical sorting order is as follows: symbols, numerics, Roman alphabetical, kana characters, Japanese symbol characters, and kanji characters.
Electronic publishing
FrameMaker 7.0 software provides powerful electronic publishing options. The Japanese version of Adobe Acrobat® 5.0 software is tightly integrated into FrameMaker 7.0 for Windows and Mac OS, allowing customers to output directly to Japanese Portable Document Format (PDF) in one step.
FrameMaker 7.0 also supports output to HTML and XML with contents written in Japanese.
FrameMaker 7.0 key features
Word processing
- Use preset styles, or define and store your own.
- Highlight revisions with change bars, and compare differences between documents with detailed reports.
- Check spelling and hyphenation for 17 western languages with a 130,000-word dictionary, and find just the right word with a built-in thesaurus.
- Import text from a variety of word processing applications, including the English and Japanese versions of
Microsoft Word and the English version of WordPerfect®. - Drag and drop objects, text, and graphics from your desktop directly into a FrameMaker document (Windows and Mac OS).
- Number pages, paragraphs, and figures automatically.
Layout
- Choose from more than 30 document templates or design your own.
- Easily create paragraph styles for side heads and run-in heads.
- Precisely control typography with font stretch controls.
- Import custom page layouts and colors.
- Create double-sided documents.
- Automatically flow your text around graphics.
- Combine portrait and landscape pages in one document.
- Straddle headlines, tables, graphics, and footnotes in a multiple-column layout.
- Automatically reformat existing pages by changing the master page.
Graphics and color
- Manipulate graphics objects with grouping, alignment, layering, and distribution tools.
- Create custom colors from a variety of color libraries: Crayon, DIC Color Guide Spot, Focoltone®, Greys, Munsell® Book of Color, Munsell High Chroma Colors, PANTONE® ProSim EURO, PANTONE Coated, PANTONE Process CSG, PANTONE Process Euro, PANTONE ProSim, PANTONE Uncoated, Toyo, and Trumatch® 4-Color Selector.
- Use the tinting feature to create more colors without increasing printing costs.
- Create layered colors that overprint automatically.
- In FrameMaker for Mac OS, gain enhanced trapping capability and color control with support for TrapWise® software.
- With support for PressWise® software in FrameMaker for Mac OS, position objects and automate the printing process.
- Make OPI 1.3 software part of your prepress workflow with FrameMaker for Mac OS.
- Draw rectangles, polygons, ellipses, and Bézier curves.
- Set the image resolution on imported graphics to the optimal DPI for printing or on-screen delivery.
- Work with the highest-quality type — FrameMaker includes Adobe Type Manager® rasterizer software and supports Adobe Type 1 and multiple master fonts.
Long documents and book building
- Automatically maintain numbering for headings, sections, steps, illustrations, tables, figures, footnotes, and equations.
- Automatically maintain cross-references within and between files.
- Use conditional text to create and store several versions of a document in a single file.
- Apply condition tags to text, graphics, and table rows.
- Automatically generate tables of contents, indexes, and lists that serve as hypertext links for HTML and PDF.
Tables
- Use the sophisticated table editor to create complex tables.
- Straddle table cells, apply periodic and custom cell shading and ruling, and create multipage tables.
- Export FrameMaker tables to other applications.
- Sort table data alphabetically and numerically, and by rows or columns.
Integration
- Easily access commands specific to text, tables, equations, and anchored frames, with context-sensitive menus.
- Share FrameMaker files across Windows, Mac OS, and UNIX platforms.
- Expand FrameMaker functionality and link to other applications with an open, C-based Application Programming Interface (API).
- Customize the user interface.
- Include text and graphics imported by reference.
- OLE 2.0 support for Windows.
Electronic distribution
- Automatically convert FrameMaker files to HTML for publishing on the World Wide Web.
- Save FrameMaker files-even books-complete with bookmarks, article threads, and hypertext links, to PDF in one step, using Adobe Acrobat Distiller® software (Windows and Mac OS) or an internal distillation process (UNIX). (Acrobat Distiller is included with FrameMaker 7.0 software, except on Japanese UNIX workstations.)
- Automatically insert hypertext links within and among documents for efficient on-screen navigation.
- Distribute FrameMaker documents online using a WebDAV server (Windows and Mac OS).
Combined Fonts in FrameMaker?
Combined fonts assign two component fonts to one combined font name. Combined fonts are special fonts created in FrameMaker that use Asian fonts for the Asian characters combined with regular fonts for the Latin characters. This is done to handle both an Asian font and a Western font as though they are in one font family. In a combined font, the Asian font is the base font and the Roman font is the Western font.
If an Asian-language document with combined fonts is opened on a system that uses a different Asian language or a Western language, the Western component font is used for all text with the combined font. Text that used the Asian component font will be unreadable. If the document is then saved and reopened on a system with its original language, the Western text will appear correctly, but the information about the original Asian text will be lost.
If you intend to move your documents across different Asian languages,do not use Asian characters for paragraph and character tag and combined font names. If you do, unexpected loss of data may occur.
When you create a new document, two combined fonts are predefined in the new document. The names of the combined fonts are FMMyungjo and FMGothic for Korean, FMSongTi and FMHeiTi for Simplified Chinese, and FMSungTi and FMHeiTi for Traditional Chinese. The most commonly used Roman and Asian fonts are assigned as the component fonts for each combined font.
To create a combined font, go to Format > Document > Combined Fonts...
NOTE: If the source document uses combined fonts, do not insert cross-references with text that includes Smart Quotes. The quotation marks become meaningless characters, and FrameMaker may crash when you use Find/Change to search for a cross-reference with Smart Quotes in a combined font.